Never give up on something that you can’t go a day without thinking about.
The renovations of the new nursery was a long process. We had been purchasing things over the years as we waited for the adoption to happen. There are also things I had from years ago I knew I wanted to put in a future nursery. Jeff and I had discussed when we decided to adopt what color we wanted for the nursery. I knew I didn’t want a theme, even though I love lambs I wanted something timeless and classic. So we went off Jeff’s favorite design theme of classic navy and white and started from there. Of course when this all started we lived in a condo with butter cream colored walls and cream carpets, so now that we could do whatever we wanted some ideas changed.
We had already found an inspiration photo of a nursery that we really loved. Then I took that and a piece of artwork I had gotten 20 years ago and started planning the room. The curtains were originally purchased the week we finalized our contract with the adoption agency, and the rocking glider came shortly after. Two key pieces complete. Every piece that was put in this room was hand picked or provided with love.
The first picture is our true starting point.
The glide we hand picked after many trips to find the right one. It’s a lovely navy blue, it swivels and rocks, and I have already spent hours just sitting and looking out the windows. The quilt my parents had custom made in Lancaster PA by an talented Amish woman. The pillow was a Home Goods find just before COVID shut us down.
The hassock was from Kohl’s and I removed the hinges so that little ones didn’t get trapped or injured as they explore.
The art work above the chair was given to my by my Aunt Robin in 2000 and I have held it for this perfect moment. I am so glad I got to design around this inspiration piece.
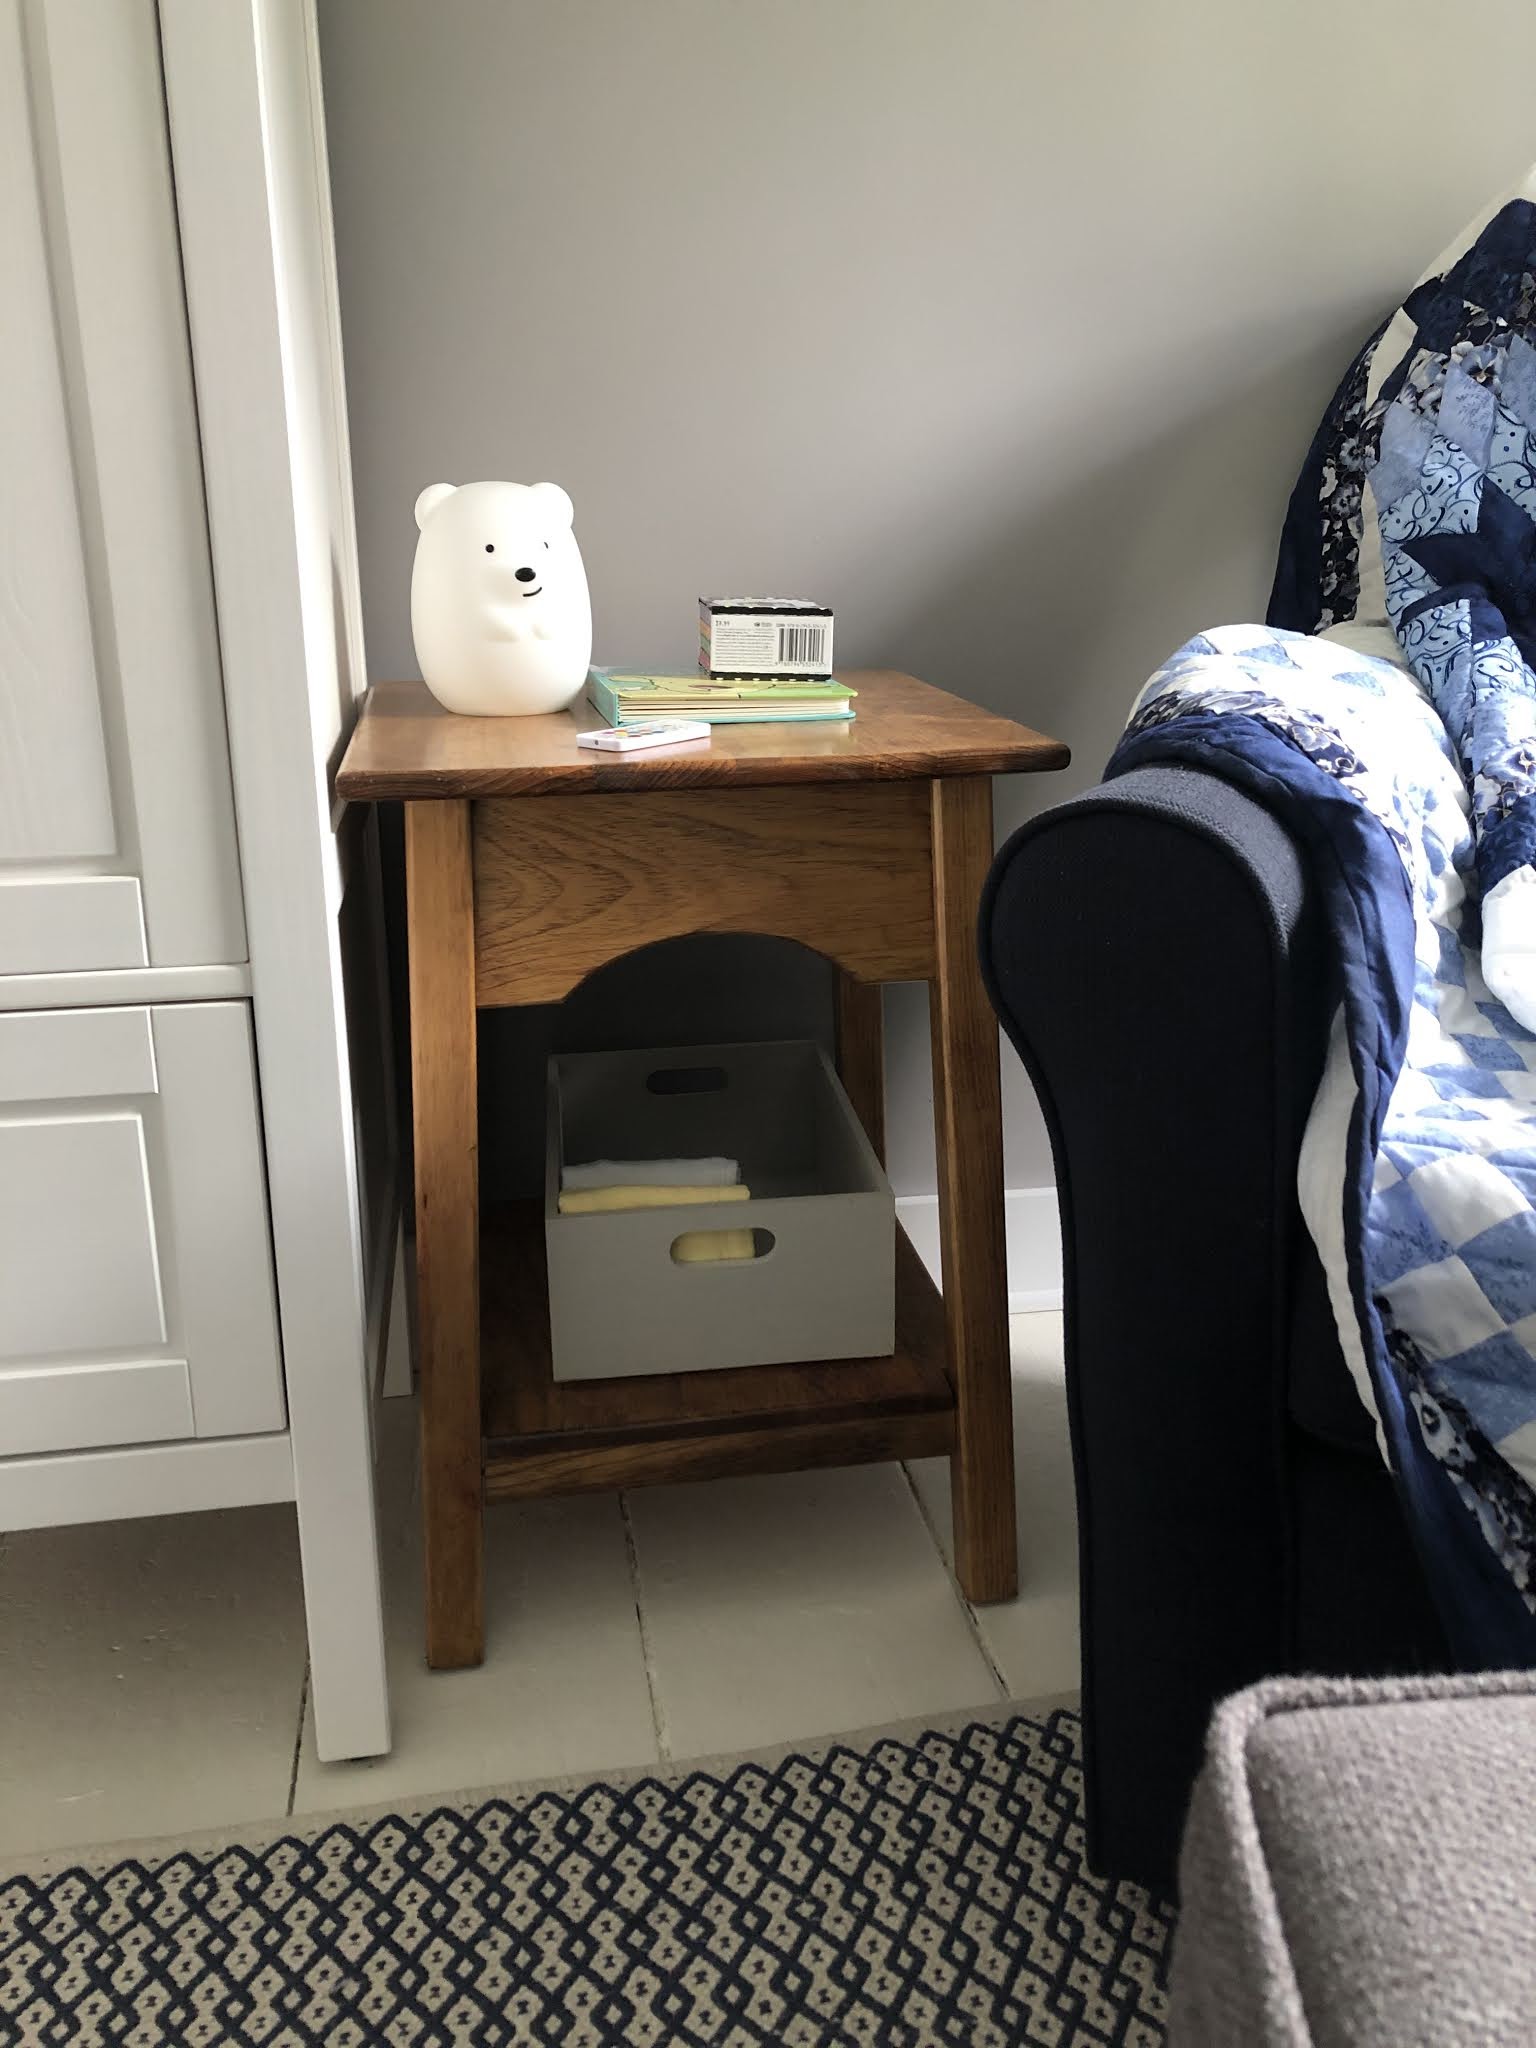
The side table was purchased a while back on a trip to Lancaster with my parents from our favorite furniture store. I mixed up a combination of stains to create a custom color. On the bottom shelf is our night time feed box with burp cloths, bottles, and other items. On top is a few books and a my favorite nightlight.
Next to the table is the armoire I got from Ikea. This was the last big piece we purchased and I love it. We have a big draw on the bottom that I have blankets in, and plenty of space to hang items in the main part. On top I know have a plant in a beautiful blue pot that matches another one I have in the room.
On the floor we chose a beautiful cream and navy area rug that gives the room a warm and cozy feeling. I believe this was a Wayfair annual sale item.
The next picture is all about cozy sleep and fun storage.
First is the beautiful crib that my mother-in-law purchased for us. I was so excited to get it from Bed Bath and Beyond using a coupon!
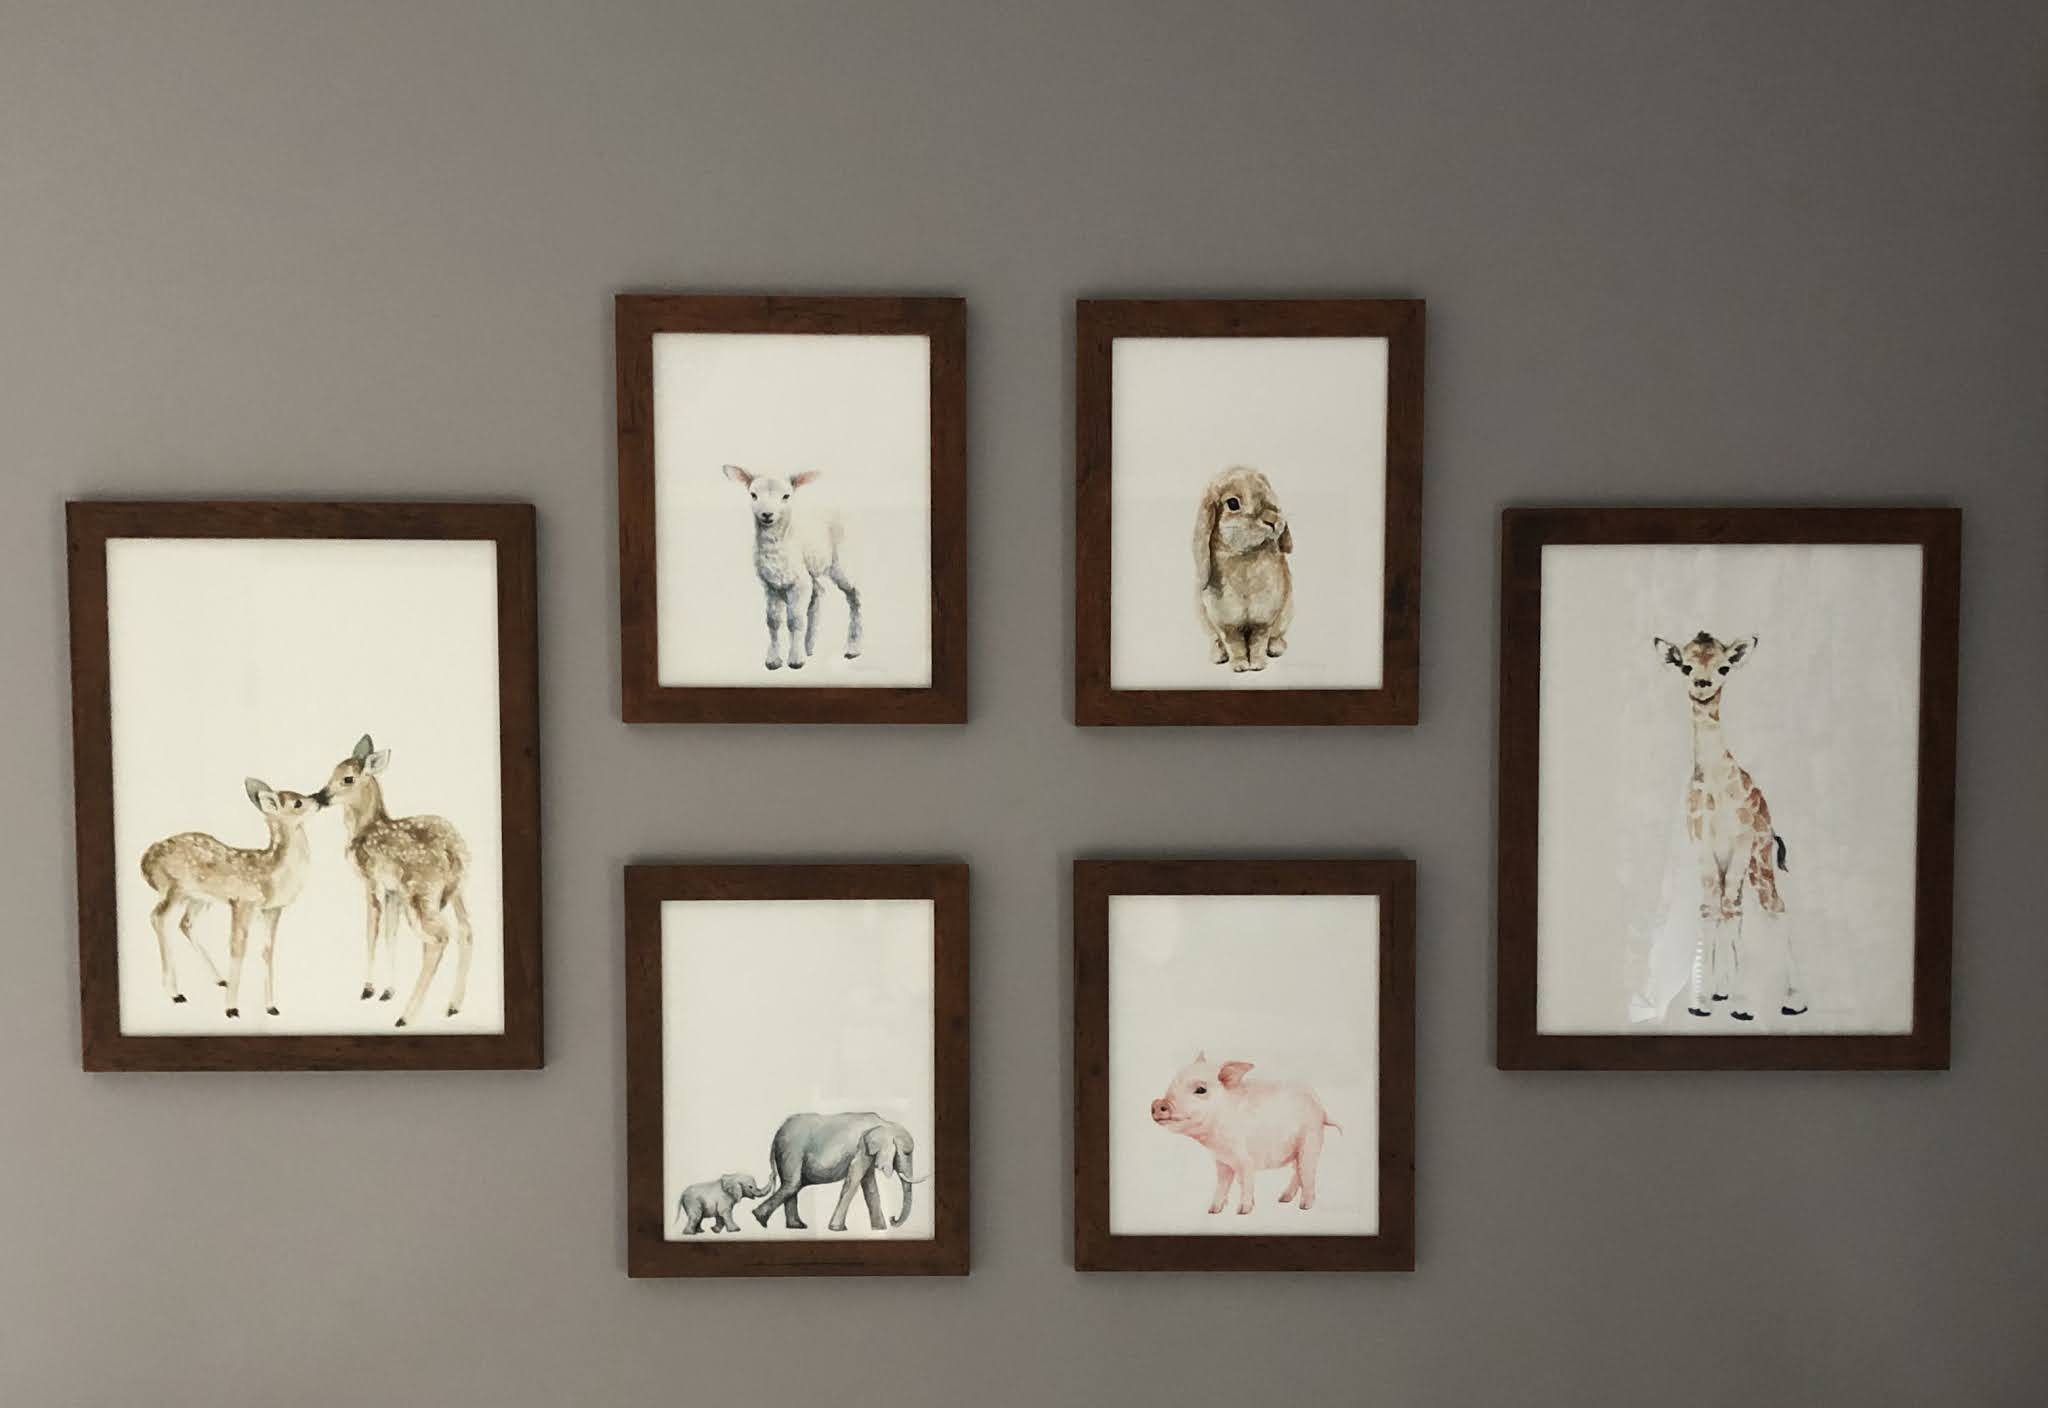
The art work is done by an amazing water color artist I follow on a Instagram. Tabitha at Fox Hollow Studios is such and amazing artist and her animal water colors were perfect for the room.
The Lamb mobile was a sweet gift from our friend May.
The crib and shelf are decorated with stuffed animals that we hand picked over the past few years.
The wooden shelves we made specially for that space to display books and toys.
The woods box on the floor is actually on wheels is finished in the custom stain I made for the table. It’s the perfect kid friendly book storage.
Above the crib hangs a beautiful dream catcher custom made by our friend Michaela.
Can we just take a moment to love the window treatments! I love these curtains more and more each day. We originally purchased one set when we lived in the condo. Then life changed and I prayed they still had them. The are timeless and the perfect design for the room.
The other item I’m in love with is the blackout shades. We got these at Lowe’s and even though they are a 1/2” to small they are wonderful. When I put them up you don’t even know they are there!
So let’s be honest this changing dresser is a repurchase. The original one was dark wood which would have been perfect in a cream room. But since it was broken during then move I knew I had to replace it. So I ordered it from Wayfair.
The artwork above was all done custom by our friend May, and I made the frames to match the table and book box.
The diaper storage is a box made by my dad and Jeff and the metal containers are a quick find from Wayfair.
Next to the dresser is our dirty diaper pail for all the cloth diapers we will use. It is just a basic white trash pale with a wet clothing bag liner.
The final area to complete was next to the chimney. I knew I wanted to get a spider plant in the room and that space needed a pop of blue. So I went on Amazon and found this pot and a matching one that worked perfect in the room. The spider plant was gifted to me from my friend Diana. I knew that I wanted a macrame plant holder and knew the perfect person to make it. I contacted my friend Mike (Diana’s husband) and asked him to use his talent to bless the room.
The final thing I needed was area dirty laundry. I didn’t want a traditional basket and found this awesome bag on Kohl’s website.
And with that our nursery is ready and we waiting for God’s blessing.